[Android] Retrofit 사용하여 서버와 http 통신하기 - (2) 동적주소, 쿼리 사용하기
2021.05.14 - [안드로이드/AAC, MVVM] - [Android] Retrofit 사용하여 서버와 http 통신하기 - (1) 기본적인 사용법
[Android] Retrofit 사용하여 서버와 http 통신하기 - (1) 기본적인 사용법
❓ 레트로핏이란 ▶ 서버와 HTTP 통신을 해서 받은 데이터를 앱에서 출력해서 보여주는 라이브러리 🔴 레트로핏 3가지 구성요소 Model(POJO) : DTO(Data Transfer Object). 서버로부터 JSON 형식으로 통
hanyeop.tistory.com
와 이어지는 글입니다.
◾ 동적주소로 통신하기
저번에는
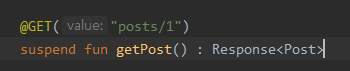
이와 같이 posts/1 의 값을 불러오는 메소드를 사용하였다.
https://jsonplaceholder.typicode.com/posts
여기서 보면 posts/ 가 1~100까지 있는것을 알 수 있다.
여기서 임의의 값을 입력받아서 그 값을 불러오려고 한다.
인터페이스, 저장소, 뷰모델 수정
// 가능한 HTTP 동작들을 정의해놓은 인터페이스
interface SimpleApi {

    @GET("posts/1")
    suspend fun getPost() : Response<Post>

    @GET("posts/{postNumber}")
    suspend fun getPost2(
        @Path("postNumber") number : Int
    ) : Response<Post>
}
인터페이스에서 숫자를 입력받아 그 값에 해당하는 결과를 출력하는 함수 getPost2를 작성해준다.
@Path 어노테이션을 사용하여 위의 @GET 과 연결해준다.
// 뷰모델에 사용하기 위한 데이터를 통신함
class Repository {

    suspend fun getPost() : Response<Post> {
        return RetrofitInstance.api.getPost()
    }

    suspend fun getPost2(number : Int) : Response<Post> {
        return RetrofitInstance.api.getPost2(number)
    }
}
실질적으로는 여기서 메소드를 사용한다.
// 데이터를 처리함
class MainViewModel(private val repository : Repository) : ViewModel() {

    val myResponse : MutableLiveData<Response<Post>> = MutableLiveData()
    val myResponse2 : MutableLiveData<Response<Post>> = MutableLiveData()

    fun getPost() {
        viewModelScope.launch {
            val response = repository.getPost()
            myResponse.value = response
        }
    }

    fun getPost2(number : Int){
        viewModelScope.launch {
            val response = repository.getPost2(number)
            myResponse2.value = response
        }
    }
}
결과값을 받을 myResponse2 라이브 데이터를 생성해주고, 아까 저장소에서 정의한 메소드를 사용하여 할당한다.
레이아웃 변경
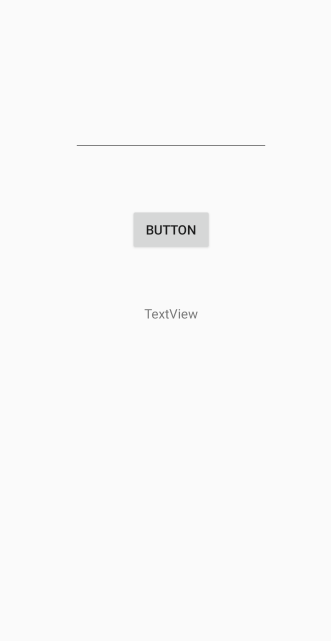
입력 받고 그 값을 표시할 수 있게 레이아웃을 바꿔준다.
메인액티비티
class MainActivity : AppCompatActivity() {

    private lateinit var viewModel : MainViewModel
    private lateinit var binding : ActivityMainBinding

    override fun onCreate(savedInstanceState: Bundle?) {
        super.onCreate(savedInstanceState)

        // 뷰바인딩
        binding = ActivityMainBinding.inflate(layoutInflater)
        setContentView(binding.root)


        val repository = Repository()
        val viewModelFactory = MainViewModelFactory(repository)
        viewModel = ViewModelProvider(this,viewModelFactory).get(MainViewModel::class.java)

        viewModel.myResponse2.observe(this, Observer {
            if(it.isSuccessful){
                binding.textView.text = it.body().toString()
            }
            else{
                binding.textView.text = it.code().toString()
            }
        })

        binding.button.setOnClickListener {
            val myNumber = binding.editTextView.text.toString()
            viewModel.getPost2(Integer.parseInt(myNumber))
        }
    }
}
숫자 입력 후 버튼 클릭시 통신한 값이 출력되도록 한다. 통신 실패시 에러코드를 출력하도록 한다.
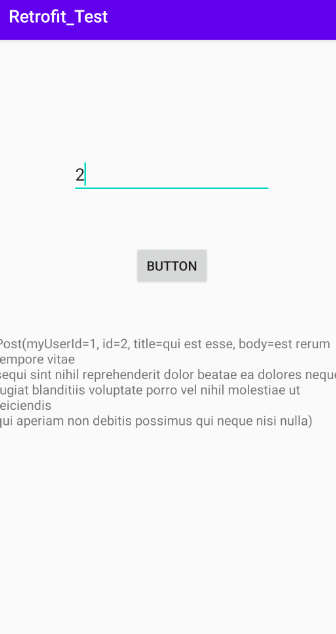
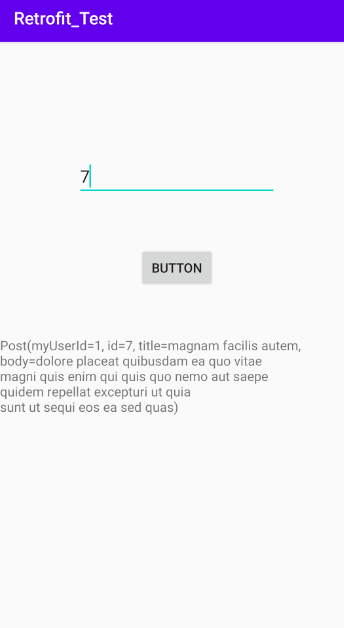
잘 출력되는 것을 확인할 수 있다.
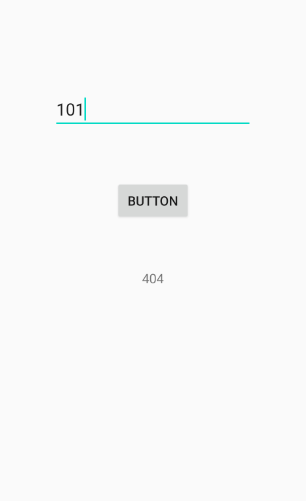
없는 주소를 사용할 시 에러코드를 출력한다.
◾ 쿼리로 통신하기
쿼리로 특정 조건에 맞는 데이터를 불러 올 수도 있다.
인터페이스, 저장소, 뷰모델 수정
@GET("posts")
    suspend fun getCustomPost(
        @Query("userId") userId : Int
    ): Response<List<Post>>
suspend fun getCustomPosts(userId : Int) : Response<List<Post>> {
return RetrofitInstance.api.getCustomPost(userId)
}val myCustomPosts : MutableLiveData<Response<List<Post>>> = MutableLiveData()
fun getCustomPosts(userId : Int){
viewModelScope.launch {
val response = repository.getCustomPosts(userId)
myCustomPosts.value = response
}
}아까와 같이 각각 인터페이스,저장소,뷰모델에 추가해준다.
쿼리로 입력받은 userId에 맞는 결과값을 리스트로 반환할 것이다.
@Query 어노테이션으로 쿼리를 작성할 수 있다.
메인액티비티
class MainActivity : AppCompatActivity() {

    private lateinit var viewModel : MainViewModel
    private lateinit var binding : ActivityMainBinding

    override fun onCreate(savedInstanceState: Bundle?) {
        super.onCreate(savedInstanceState)

        // 뷰바인딩
        binding = ActivityMainBinding.inflate(layoutInflater)
        setContentView(binding.root)


        val repository = Repository()
        val viewModelFactory = MainViewModelFactory(repository)
        viewModel = ViewModelProvider(this,viewModelFactory).get(MainViewModel::class.java)

        viewModel.myCustomPosts.observe(this, Observer {
            if(it.isSuccessful){
                binding.textView.text = it.body().toString()
                it.body()?.forEach{ post ->
                    Log.d("Response",post.myUserId.toString())
                    Log.d("Response",post.id.toString())
                    Log.d("Response",post.title)
                    Log.d("Response",post.body)
                    Log.d("Response","-------------------------")
                }
            }
            else{
                binding.textView.text = it.code().toString()
            }
        })

        binding.button.setOnClickListener {
            val myNumber = binding.editTextView.text.toString()
            viewModel.getCustomPosts(Integer.parseInt(myNumber))
        }
    }
}
리스트 형태로 반환되므로 확인시 보기 편하게 foreach로 로그에 찍는다.
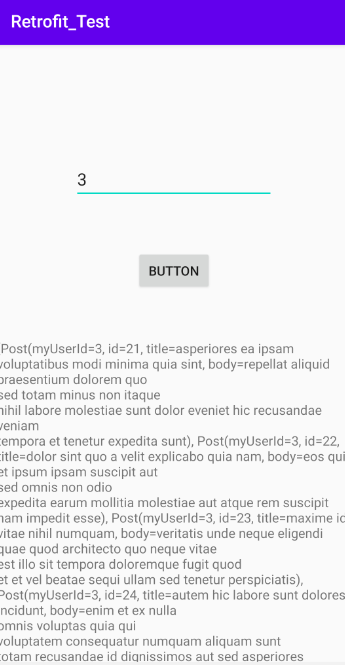
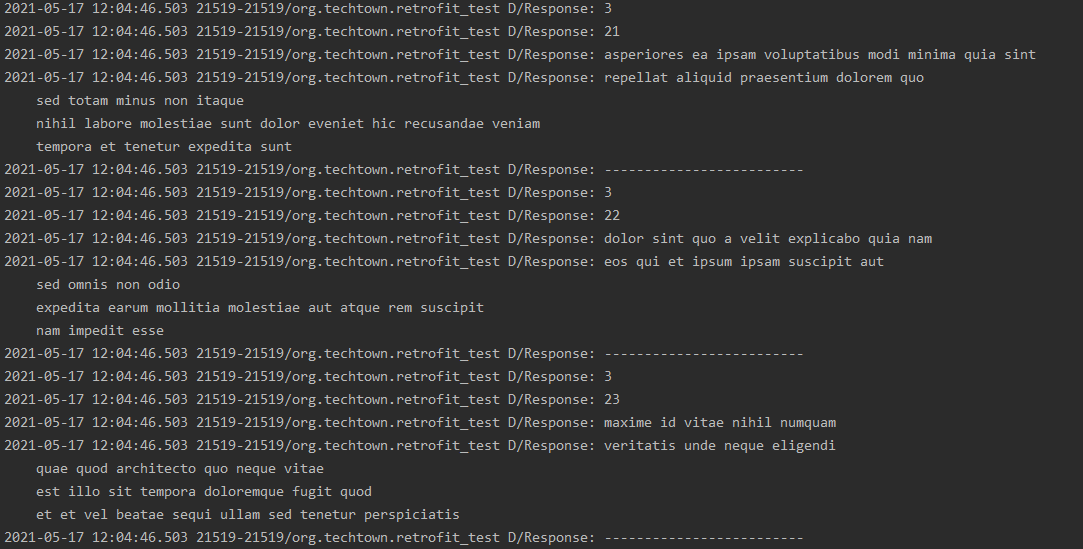
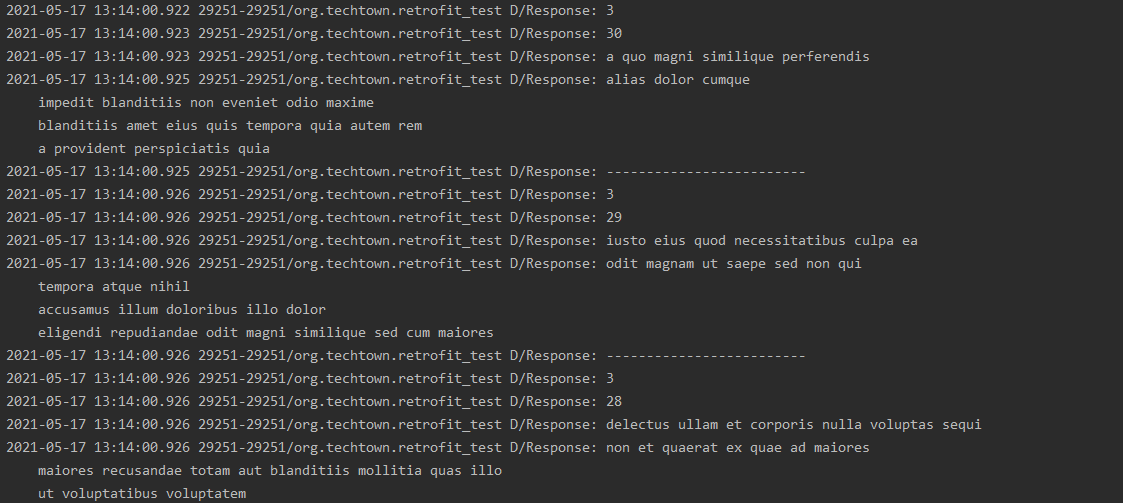
아이디에 맞는 모든 값이 출력된 것을 확인할 수 있다.
https://jsonplaceholder.typicode.com/posts?userId=3
주소창에서 ?과 조건을 작성하면 동일한 결과값을 확인할 수 있다.
◾ 다중쿼리로 통신하기
또한 조건을 여러개 사용할 수도 있다.
인터페이스, 저장소, 뷰모델
@GET("posts")
    suspend fun getCustomPost2(
        @Query("userId") userId : Int,
        @Query("_sort") sort : String,
        @Query("_order") order : String
    ): Response<List<Post>>
suspend fun getCustomPosts2(userId : Int, sort : String, order : String) : Response<List<Post>> {
return RetrofitInstance.api.getCustomPost2(userId,sort,order)
}val myCustomPosts2 : MutableLiveData<Response<List<Post>>> = MutableLiveData()
fun getCustomPosts2(userId : Int, sort : String, order : String){
viewModelScope.launch {
val response = repository.getCustomPosts2(userId,sort,order)
myCustomPosts2.value = response
}
}아까와 같이 각각 인터페이스,저장소,뷰모델에 추가해준다.
메인액티비티
binding.button.setOnClickListener {
            val myNumber = binding.editTextView.text.toString()
            viewModel.getCustomPosts2(Integer.parseInt(myNumber),"id","desc")
        }
정렬 기준에 id, 순서는 내림차순으로 입력하였다.
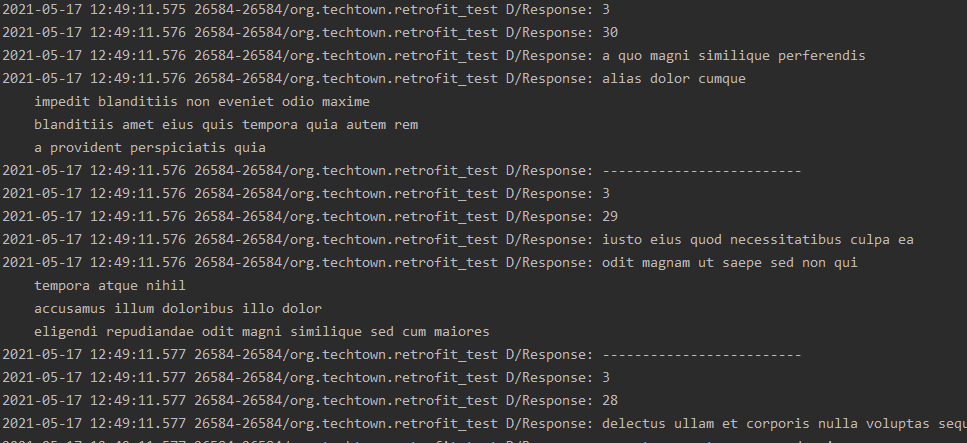
아까와 달리 내림차순으로 출력되는 것을 확인할 수 있다.
https://jsonplaceholder.typicode.com/posts?userId=3&_sort=id&_order=desc
주소창에서 ?과 &을 이용하여 작성하면 동일한 결과를 확인할 수 있다.
◾ 다중쿼리로 통신하기 (쿼리맵)
위와 같은 다중쿼리를 쿼리맵으로 작성할 수 있는데,
@QueryMap 어노테이션을 사용하면 된다.
인터페이스, 저장소, 뷰모델
@GET("posts")
    suspend fun getCustomPost3(
        @Query("userId") userId : Int,
        @QueryMap options : Map<String, String>
    ): Response<List<Post>>
suspend fun getCustomPosts3(userId : Int, options : Map<String, String>) : Response<List<Post>> {
return RetrofitInstance.api.getCustomPost3(userId,options)
}val myCustomPosts3 : MutableLiveData<Response<List<Post>>> = MutableLiveData()
fun getCustomPosts3(userId : Int, option : Map<String, String>){
viewModelScope.launch {
val response = repository.getCustomPosts3(userId,option)
myCustomPosts3.value = response
}
}각각 작성해준 후
val options : HashMap<String, String> = HashMap()
        options["_sort"] = "id"
        options["_order"] = "desc"

        binding.button.setOnClickListener {
            val myNumber = binding.editTextView.text.toString()
            viewModel.getCustomPosts3(Integer.parseInt(myNumber),options)
        }
해시맵 형태의 옵션 변수를 만들어 조건들을 할당해준다.
아까와 동일한 값이 출력되는 것을 확인할 수 있다.
https://github.com/HanYeop/AndroidStudio-Practice/tree/master/Retrofit_Test
HanYeop/AndroidStudio-Practice
안드로이드 학습 내용 저장소. Contribute to HanYeop/AndroidStudio-Practice development by creating an account on GitHub.
github.com
참조
https://www.youtube.com/watch?v=Dw_BIR5K82Q&list=PLSrm9z4zp4mF1Ssdfuocy2XH5Bw4wLLNw&index=2